How to Enable System Restore in Windows 7
How to Disable System Restore in Windows 7
How to Disable System Restore in Windows 7
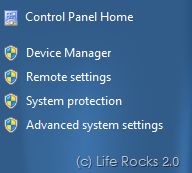
System Restore helps you to restore the computer to a previously saved state in case any thing goes wrong with your OS. You can configure System Restore for one drive or all drives in your PC, so that when you create a System Restore point, only those drives are restored where this functionality is enabled. To configure System restore, right click on ‘My Computer’ and select Properties. In the left hand side of the properties window, click on the link ‘System protection’.

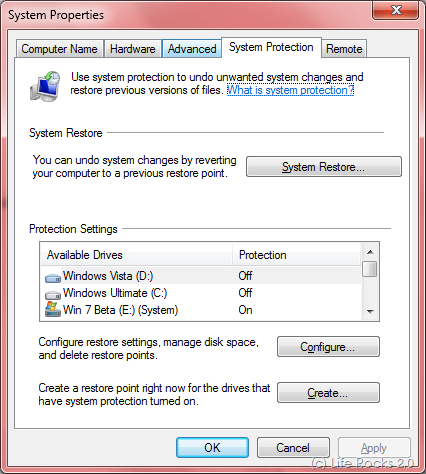
This will open up the System protection tab where you can configure System Restore.

Here you can see which all drives are having System Restore enabled. You can change the setting by selecting the drive and clicking on Configure button.

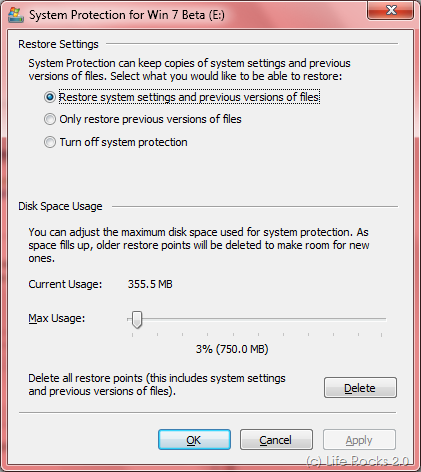
Here you can turn off or on System Restore for the selected drive and also configure the disk space for System restore by dragging the slider. Since enabling System Restore consumes hard disk space, you can it turn off on drives which does not need them.
This will open up the System protection tab where you can configure System Restore.
Here you can see which all drives are having System Restore enabled. You can change the setting by selecting the drive and clicking on Configure button.
Here you can turn off or on System Restore for the selected drive and also configure the disk space for System restore by dragging the slider. Since enabling System Restore consumes hard disk space, you can it turn off on drives which does not need them.

0 nhận xét:
Post a Comment