File Sharing Mac OS X Lion and PC Windows 7
If you want to enable file sharing between OS X Lion and Windows 7 computers then there are some step you need to do first. Follow the steps given below to see how you can share files between OS X Lion and Windows 7 computers.
Make sure both Mac and PC are connected with the same network connection.
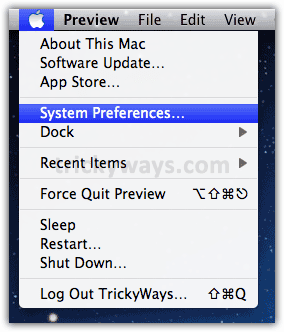
Open “System Preferences” from Apple menu
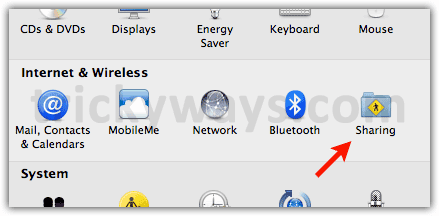
Click on “Sharing” icon from “Internet & Wireless” section
Step-2
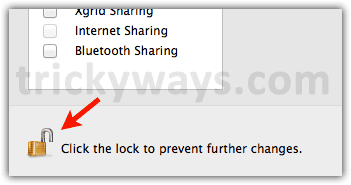
Click the Lock icon to unlock if its already Locked, you may need to enter the current logged in user password
Step-3
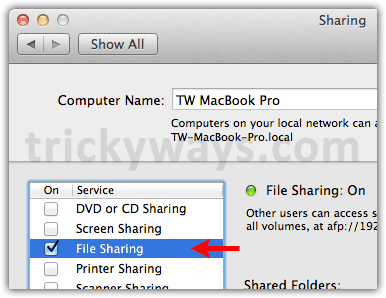
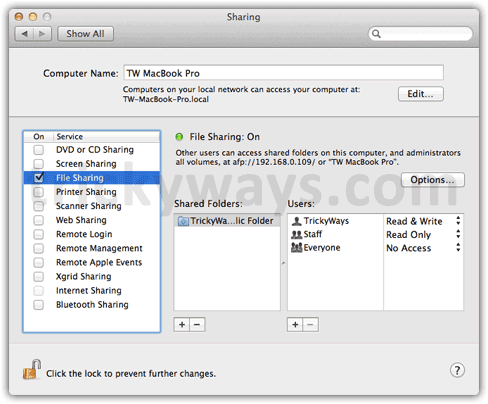
Now turn the “File Sharing” service On by click on its check-box
Step-4
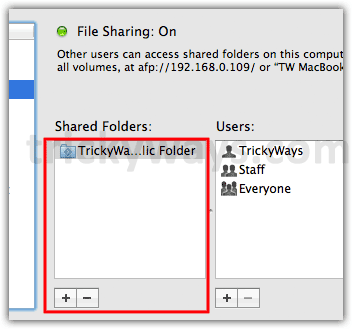
Under “Shared Folders” section select folder that you want to share. If the folder is not in the list Click the + button to add specific folder in the Shared Folder list
Step-5
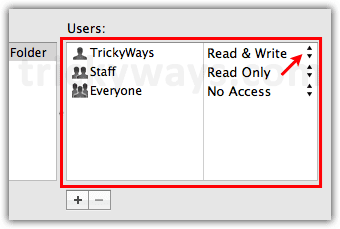
Under “Users” section select the current logged in user and change the user Rights to “Read & Write” by clicking on tiny arrows. Also change Rights of “Everyone” to “No Access”
Step-6
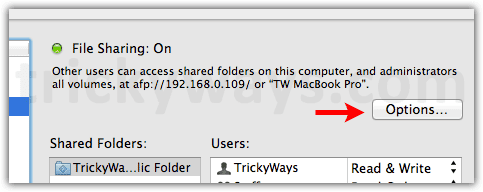
Now Click on “Options” button
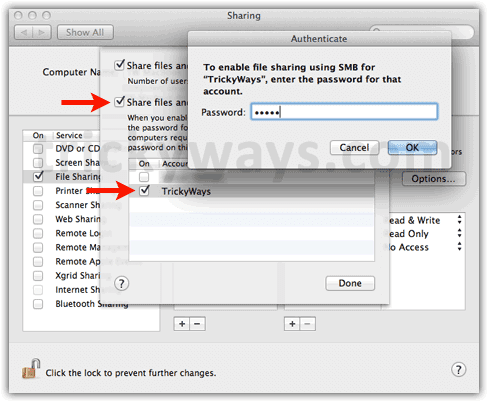
Check the “Share files and folders using SMB (Windows)” option
Check the logged in user name Check-box, you need to enter its password, click OK, Click the Done button.
Step-7
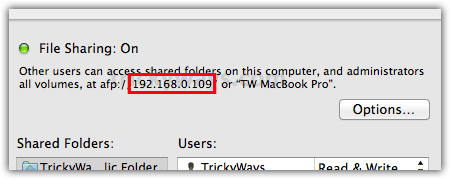
Note down the IP address as shown on your Mac.
Close the File sharing window on Mac
Now open Run windows in Windows 7 by pressing
Step-9
Type the IP address of your Mac computer that you have noted down in step-7
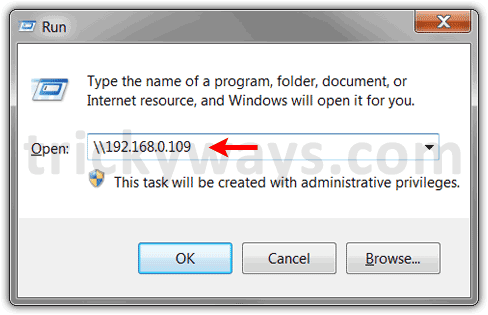
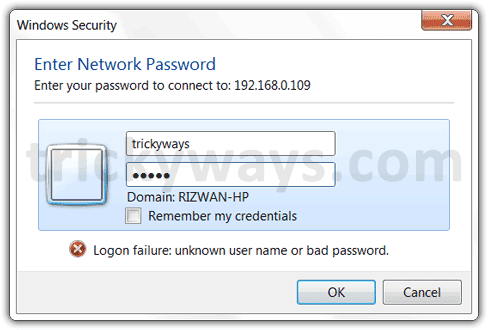
This will prompt for the Username and Password of the Mac computer. Type the Username that you have selected in step-5 and 6.3 and its Password, hit the OK button
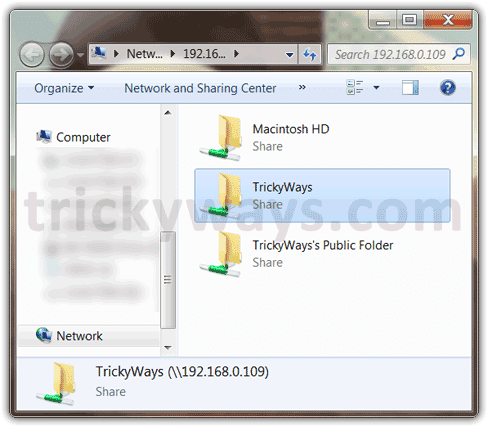
You will see all the shared folders of Mac OS X Lion in Windows 7. Now you can Cut, Copy, Paste or Delete any Mac’s shared files or folders from within Window 7.
If yo want to do the reverse process see how to accees Windows 7 files on OS X Lion
If you want to enable file sharing between OS X Lion and Windows 7 computers then there are some step you need to do first. Follow the steps given below to see how you can share files between OS X Lion and Windows 7 computers.
Make sure both Mac and PC are connected with the same network connection.
Steps on Mac OS X Lion
Step-1Open “System Preferences” from Apple menu
Click on “Sharing” icon from “Internet & Wireless” section
Step-2
Click the Lock icon to unlock if its already Locked, you may need to enter the current logged in user password
Step-3
Now turn the “File Sharing” service On by click on its check-box
Step-4
Under “Shared Folders” section select folder that you want to share. If the folder is not in the list Click the + button to add specific folder in the Shared Folder list
Step-5
Under “Users” section select the current logged in user and change the user Rights to “Read & Write” by clicking on tiny arrows. Also change Rights of “Everyone” to “No Access”
Step-6
Now Click on “Options” button
Check the “Share files and folders using SMB (Windows)” option
Check the logged in user name Check-box, you need to enter its password, click OK, Click the Done button.
Step-7
Note down the IP address as shown on your Mac.
Close the File sharing window on Mac
Steps on Windows 7
Step-8Now open Run windows in Windows 7 by pressing
Ctrl+R buttons from keyboardStep-9
Type the IP address of your Mac computer that you have noted down in step-7
. Type the IP address in the format as show below and hit the OK buttonThis will prompt for the Username and Password of the Mac computer. Type the Username that you have selected in step-5 and 6.3 and its Password, hit the OK button
You will see all the shared folders of Mac OS X Lion in Windows 7. Now you can Cut, Copy, Paste or Delete any Mac’s shared files or folders from within Window 7.
If yo want to do the reverse process see how to accees Windows 7 files on OS X Lion

0 nhận xét:
Post a Comment